-
Products
 Mobile Utilities
AVCLabs Video AI is a cutting-edge video enhancement solution designed to elevate the quality of your video content effortlessly. With advanced AI-powered algorithms, it offers a suite of powerful features, including upscale capabilities to enhance resolution, colorization for vivid imagery, motion compensation to ensure smooth playback, and face recovery for improved facial details.
For Video Enhancer AI, the system and hardware requirements may be more stringent than any other applications that you have used. Be sure to check your computer hardware and system configuration before using our software. For more information, refer to System and Hardware Requirements.
Step 1
Download and install AVCLabs Video Enhancer AI
Download the installation package compatible with your operating system (Windows or macOS). Double-click the downloaded file to install the software on your computer.
Step 2
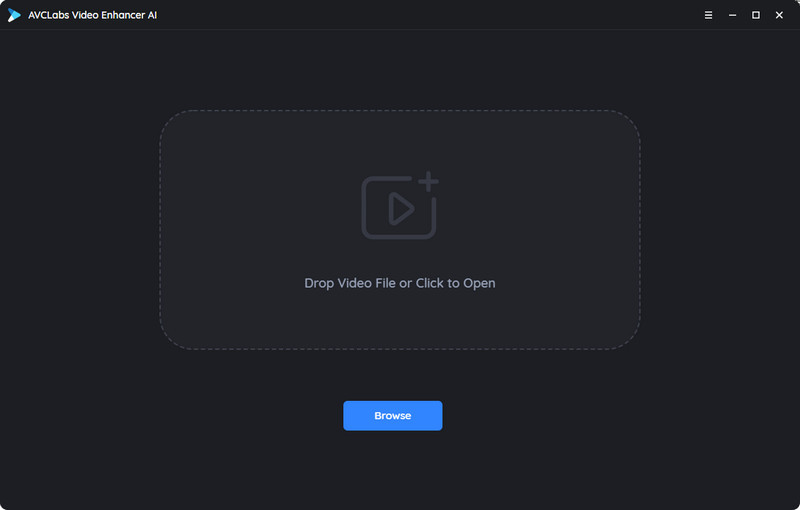
Add videos
You can click "Browse" to select a video file or drag and drop it directly into the program. It also supports batch processing on multiple videos.
Step 3
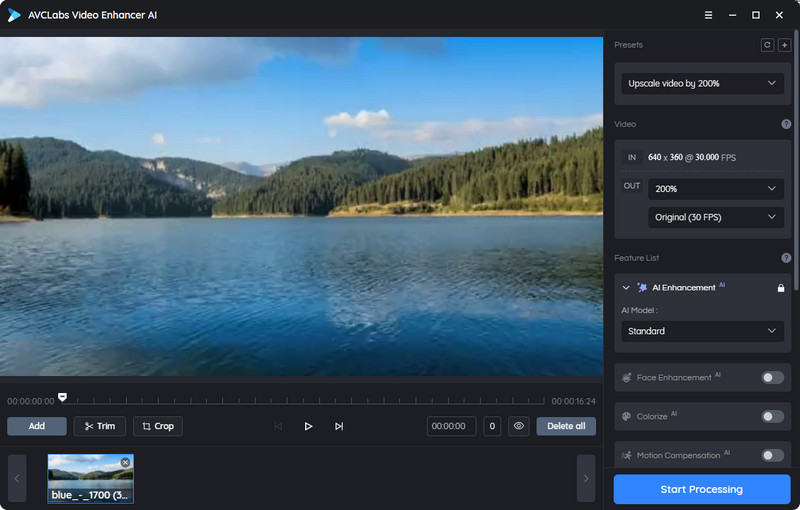
Configure program settings
You can use the presets or choose custom settings.
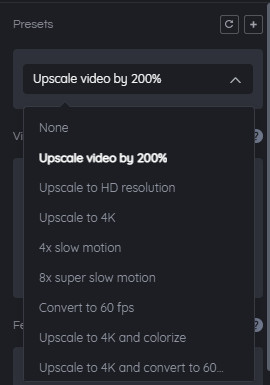
The Presets include a list of pre-defined editing settings, you can choose your preferred one from the list or create your own by saving your commonly used settings as a new preset.
When there is no suitable preset, you can configure your own settings. There are 4 different AI options to choose from: AI Enhancement, Face Refinement, Colorize, and Motion Compensation. They can be enabled separately or simultaneously. Take care not to enable multiple AI features simultaneously as it will lead to slow processing speed and possible crashes.
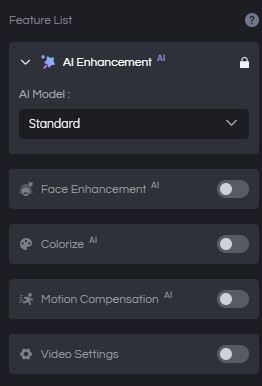
The AI Enhancement with Standard model is enabled by default when you import a video. There are 5 model options for the AI Enhancement: Standard, Ultra, Standard (Multi-Frame), Ultra (Multi-Frame), and Denoise. You can refer to the AI Models page to learn more information about each model.
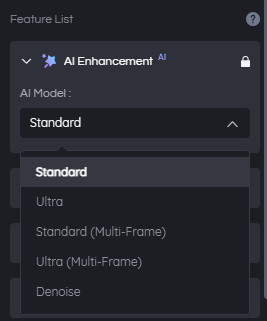
Note: The Standard (Multi-Frame) and Ultra (Multi-Frame) models are only available for the Windows version.
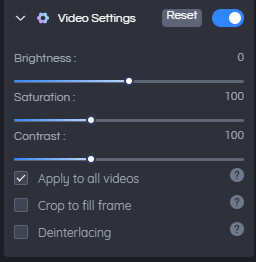
After configuring the AI settings, you can adjust the general video settings such as brightness, saturation, and contrast to achieve your desired video output.
Step 4
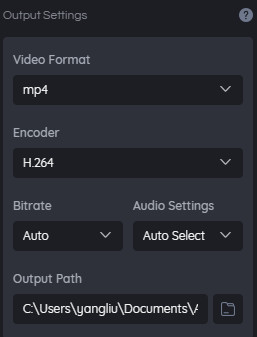
Specify output settings
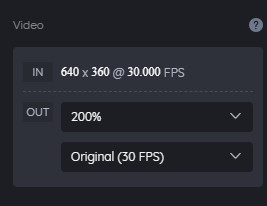
Determine the output video size and output FPS. Under the Video menu, you can choose the video size either by percentage or specific width and height values. It is recommended to keep the original FPS as changing FPS can significantly slow down the processing speed.
Adjust other output settings such as video format, encoder, bitrate, audio settings, and destination folder.
Step 5
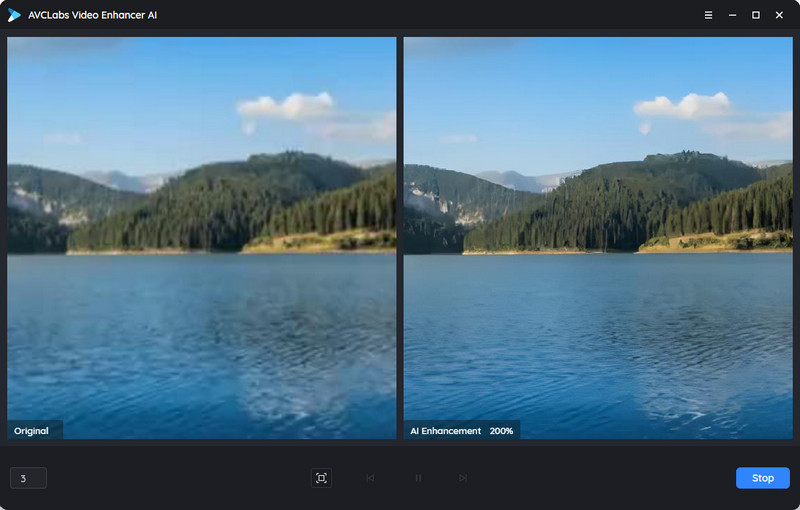
Preview
Before starting the enhancement, you can click the Preview icon to watch a preview of the enhanced video with the selected AI features applied for the first 30 frames of your video. You can also determine the start point you want to preview from.
Step 6
Export videos
If you are satisfied with the preview and settings, click the Start Processing button to enhance the video. The processing speed varies with your computer hardware, the original video resolution, and the program settings. When the video processing is completed, locate the enhanced video in the designated output folder, and you're now ready to use or share your improved video.
Money Back Guarantee
100% Secured and Clean
Free Technical Support
Customer Service within 24 Hours
© 2005-2026 Anvsoft Inc.All Rights Reserved.